Mostrando entradas con la etiqueta recipe. Mostrar todas las entradas

martes, 27 de enero de 2015

Eggplant Parmigiana

The Eggplant Parmigiana is a most famous southern italian dish, and we're sure that once you've tried it, it'll become a classic in your kitchen too!


Many are the places that claims to have created this simple yet delicious dish, as always happens with the great things, everyone's interested in demonstrating his "paternity" to it. The Eggplant Parmigiana is typical in many Italian regional cuisines, and even if many thinks that this kid was born in the Campania region, the only region that actually obtained an official title to demonstrate it is Sicily.

Two are the main ingredients of the Parmigiana (no, neither of the two is the Parmigiano Reggiano cheese, curiously). We're talking of the Tomato and the Eggplant or Aubergine if you're London-based. These two ingredients are just marvellous together, they are a match made in food heaven, they always seems to have been around together since forever. Today, they are two of the most representative ingredients of the Mediterranean cuisine, but they're really not mediterranean at all. Shocked? Keep reading!


Mr. Tomato and miss Aubergine agreed to have a blind date that they decided to occur in Sicily, somewhat halfway between America (Tomato) and Asia (Eggplant-aubergine).
The first one to reach the meeting point was miss Aubergine, around year 827, brought there by the hands of the Moors. The poor pretty lady had to wait a long long time for her pretender, but miss Aubergine in Sicily found a second house, and she even called her friends to reach her in that beautiful island. In a little while, Sicily was filled, packed of miss Aubergines, all of these waiting for the "Caravan of love" to come from America with many, many Mr. Tomatoes.

miss Aubergine went to Sicily for tourism but decided to remain there.


They say that in that year Cristopher Columbus discovered America, but we all know that it was just an excuse: come on, let's be realistic, Columbus went there just to pick up the Tomato that were horribly late for their blind date! (knowing Mr. Tomato pretty well, we dare to say that he was too much nervous because he wanted to give an excellent first impression). What would it be of Italian gastronomy without the tomato!? It would be really unthinkable! The variety of dishes made with tomatoes is just countless: pasta, salads, meals, pizza...and a million of other dishes useless without that gorgeous fruit dressed up like it was a veggie. One may be allowed to think that if it were not for the discover of the tomato, many dishes wouldn't even exist nowadays! But shush! Let's not say this aloud, we don't want the tomato to talk big.


Finally, it was Hernan Cortes who brought tomatoes to Europe, around year 1500 (men seems to be never in a hurry!). Before reaching Sicily, actually, they call at Madrid, Spain (if we close our eyes we can imagine the tomatoes running from a Terminal to another in Madrid's labyrintic Barajas Intercontinental Airport!). Mr. Tomato, just arrived in the Old World, was considered to be just a non edible ornamental plant: we guess that he spent way too much time getting himself all dolled up! Shall we agree that this is one of the World's first examples of Metrosexuality in the history of mankind, shall we?


The meeting of Mr. Tomato and miss Aubergine


When he finally managed to reach Sicily and he met miss Aubergine, it was more than just love at first sight: it was a premeditated love, a love written in the skies by destiny. A love that is very strong still today, if we judge by the number of dishes where they appears to be gloriously married together.
It's like an artistic duo: when they appears together, magical things happens! We had to wait many centuries to see them shining together, but they definitely worth all the time spent! To be completely sincere with you, there are also other dishes that came before the Parmigiana and had miss Aubergine as a starring actress: we're talking about the Sicilian "Caponata", but don't worry, we'll talk about it in another occasion!


We can find the Eggplant Parmigiana (Parmigiana di Melanzane in Italian) recipe for the first time in a cookbook published in Naples in year 1778, titled "Il cuoco elegante" (the elegant cook) and written by Vincenzo Corrado. In the 1839 book "Cucina teorico-pratica" ("practical-theoretical cuisine") by Ippolito Cavalcanti (from Naples too) we can read the Parmigiana recipe almost as we know it today.

Parmigiana di Melanzane, or in english Eggplant Parmigiana


Pretty as much as it happens with its birth, even the origin of the name of the Parmigiana is surrounded by many hypotesis and uncertainities. We can think the Parmigiana to be somewhat linked with the Parmigiano Reggiano cheese, or in the beautiful city of Parma, in north of Italy. Actually, in Parma, a very high end gastronomical city, there was a tradition in cutting veggies into slices and presenting them cooked one above the other, just like Parmigiana. We tend not to agree much with this option, since there are no immediate links between Parma and Sicily at the time of the supposed birth of the Parmigiana, even if many excellent food historians and food scholars like Luciano Pignataro do support this hypotesis and think that the Eggplant Parmigiana means "eggplant cooked as they do in Parma".


The other hypotesis comes straight from the Sicily itself, where the vernacular word "parmiciana" means louver, therefore indicating a structure composed of different slats one above the other, just like what happens with the Parmigiana. We are more convinced by this option, since we know that the Moors had windows similar to our jealousie windows and they brought them wherever they went, as it happened with the eggplant. It mustn't surprise then that there might have been a Moorish dish with sliced fried eggplants in the Arab Sicily that was the grandma of our Parmigiana recipe.

What it seems to be sure is that the Parmigiana less or nothing have to share with the "King of Cheeses", the unique and only Parmigiano Reggiano, even if in modern-days Parmigiana that marvellous northern Italian cheese is used gratinated above the dish. On the other hand, what dish does not enjoy some gratinated Parmigiano? In different regional version of this recipe we can see that are used Pecorino or Caciocavallo cheeses.


But now it's time to put something under our teeth! Let's go with the very simple and delicious recipe!

Recipe:

Ingredients: (As always, the quantities written above are just an indication: with three middle sized eggplant you can obtain four portions of Parmigiana, and according to this ratio, modify the quantity of eggplant needed)

- 3 middle sized eggplant
- 500 - 800 g aprox. of tomato sauce (preferably home made)
- Breadcrumbs
- Flour
- 2 or 3 eggs
- 100 g. of authentic Parmigiano Reggiano cheese (only the original!)
- Olive oil
- Basil
- 2 fresh Mozzarella (better if it's "fior di latte")

Preparation:

1- We start peeling our eggplants (the skin of the eggplant may result bitter in our palates), we wash them into slices somewhat less than half an inch wides, we put them in a colander and the sprinkle some salt above them. We let the eggplants to "sweat" to let them lose their water, for about an hour. After this, we wash the slices, we dry them and we bread them.


2- To bread our eggplants, we'll pass the slices through flour, then through beaten egg and last through breadcrumbs. We'll fry them in boiling oil until they become golden brown in both sides and we dry them using a kitchen paper to get rid of the excess of oil.


Flour, eggs and breadcrumbs


3- In a platter fit for the oven, we put the eggplant slices in the bottom of the dish, then we cover it with tomato sauce (ours is made with pepper and garlic), then add sliced or little pieces of mozzarella fresh cheese to taste, basil leaves and then we add another layer of eggplants, following the order, just like you would do cooking a lasagna.

  4- The last layer will end with tomato sauce, mozzarella and gratinated Parmigiano Reggiano. We'll pop it into the preheated oven for 25 to 30 minutes at 180ºC. They say that the Parmigiana is to be left into the oven "finchè si asciuga", that in italian means  "until the sauce gets dry" and we can appreciate a golden brown crust above it.


It is a delicious dish that you can enjoy both warm or cold.


Last but not least, you can cook a light version of the Parmigiana using grilled eggplant instead of fried ones. You can also fry them only passing them through the beaten eggs or breading them only with flour and not with breadcrumbs...you choose how! Just try it, you'll fall in love with it in a matter of seconds!


Buon Appetito!


Image and video hosting by TinyPic

jueves, 6 de noviembre de 2014

Candied fruit filled Donut


rosquetes rellenos de fruta o pasas


Want something sweet, fast and easy for these autumn's afternoons? Well, that great! Put a pot of water on heat, we'll bring you some rosquetes!

Rosquetes, rosquillas, donut...they have a thousand of names! But they all have got an important characteristic: they're all sooo good! They're typical in many festive occasions, like Christmas, Holy week or Carnival, but they're excellent for any occasion throughout the year, as a breakfast or a snack too!

Today we'll bring you a double donut, they're extremely easy do to, I grant you, they will be eaten in a blink of an eye! They're filled with raisin and almond, but at the endo of the day, you choose freely the ingredients, you can change it your way! So, what are you waiting for? Join the donut cause! Furthermore, if you've got children, they'll have a load of fun! Oh, just don't consider the mess you'll have in you kitchen...flour! Flour everywhere! Well, at least they've enjoyed the baking!


Ingredientes básicos para hacer rosquetes
Ingredients 


Ingredients:

  • 400 g. of flour
  • 100 g. of sugar
  • 2 eggs
  • 100 ml.of olive oil
  • 100 ml. of milk
  • 1 tsp of aniseed
  • 1 tsp of  baking powder
  • 100 g. of minced almonds
  • Candied fruit or raisin to taste
  • Oil to fry


rosquetes de pasas
Rosquetes, rosquillas...no importa cómo los llames, están buenísimos!


Preparation:

- Mix together all the ingredients, adding last the sifted flour.

- Knead a little bit with the hands in a table or a surface covered with flour, until you obtain an uniform dough. It shouldn't be too sticky, you want it just to be a little bit soft. Cover it and let it rest a while.

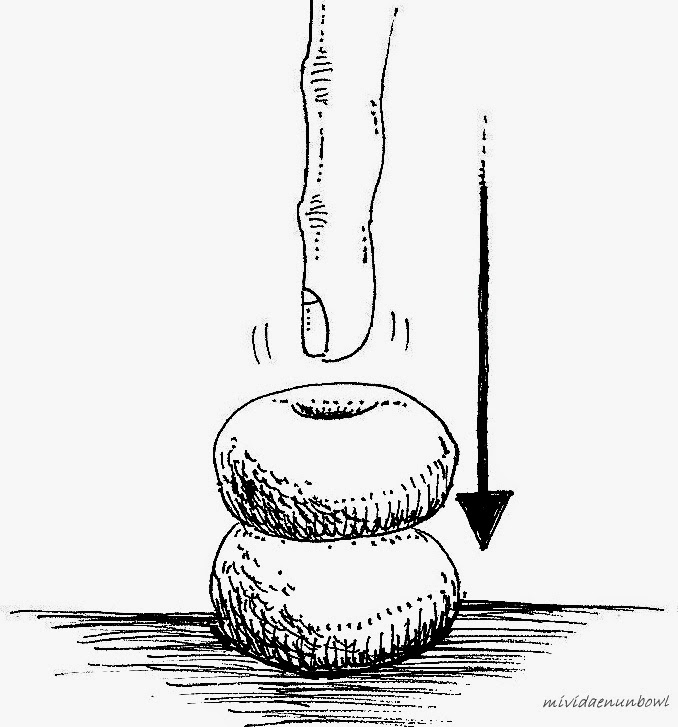
- Grease your hands with the oil so the dough will not stick to you hands and work the dough until you obtain balls that are more or less uniform. Put a ball above the other and insert your finger in the dough so to punch a hole in the dough and stick together the two donuts. In this way you'll have a "twin donut".


- Fry them in abundant hot oil. Use a deep pan to fry them, so, when you put the donuts to fry one by one, they'll drown at the beginning, but then they'll float. When they do so, just turn them upside down and when they'll be golden brown, just take them out of the boiling oil and sprinkle them with confectioner's sugar. They're just so fast to do!


Interior del rosquete
Yummy! The interiors of these donuts looks like a cake!

Image and video hosting by TinyPic

jueves, 30 de octubre de 2014

The Pumpkin Pie Spice

The Fall brings with it a wonderful variety of colours, of shades, of flavour and...tastes! We here at the Bowl are really in love with the Fall, it's the perfect season for poets, for artists, for sensitive soul and...geat yummy food! Today we want to talk to you about a special ingredient, a great companion for one of the Fall's gastronomical stars: the Pumpkin Pie Spice!


This mix of spices was invented in America in order to have a stronger pumpkin experience. The spices that form this mix are quite strong, if you take them one by one, but alltogether they're great and so harmonious.  You can make it at home using cloves, the Jamaica "Allspice" pepper, cinnamon, ginger and nutmeg. The Pumpkin Pie spice is used also in a very well known coffeehouse chain, for its typical Pumpkin Pie Spice Latte, a very original "latte". Many was upset when they found out that their pumpkin latte actually had no pumpkin taste in it! og course, you can use at home you Pumpkin Pie Spice to sip a great cappuccino! 


It is worth saying that the Jamaica "Allspice" it isn't actually a "true" pepper, is rather a dried "berry", and its taste may reminds you a mix of spices like the nutmeg, the cinnamon and the ginger. The Pumpkin Pie Spice is used in many pumkin-based pies and drinks. A very versatile ingredients, indeed! Let's see how to prepare it!

Ingredients:

1 tbsp of cloves powder
1 tbsp of Jamaica "Allspice" pepper in powder
3 tbsp of cinnamon in powder
2 tbsp of ginger
2 tbsp of nutmeg

Procedure:

Ready? Mix all the spices together until you obtain a pretty homogeneous mix. When you mix it, you'll smell the magic taste of these spices becoming one! You can put your Pumpkin Pie Spice in a little jar and keep it ready to use. We advice you: this spice may cause serious addiction! Use this mix for your Fall pumpkin pies, or also for your frappè or your smoothies! There's no best way to enjoy the fall and the foliage than tasting fall's very own tastes! It's a great colourful season, you gotta love it!


(Fall) Season greetings!


Image and video hosting by TinyPic

Pumpkin cheesecake with salted caramel and pecan nuts

cheesecake de calabaza con caramelo salado y nueces pecanas

Today we bring you a special recipe to celebrate Halloween! We and our friends bloggers have decide to make something special and fun at once. We decided to fill up the internet with Pumpkins!

Have you ever heard of a Hop Blog? We neither...or at least we didn't until a week ago or so. How can I describe it? Well, it's a sort of "flash mob" made by bloggers: many different blogs decides to post about a single topic all at once at a given hour of a given day. This Hop Blog is pumpkin-themed. So, at the end of our post you'll find a lot of links that are our friends' blogs. They all talk about the same thing, there's a lot of fuss about the pumpkin there! You can find a lot of great blogs about many different areas of interest, DIY, decoration, recipes, you name it! Don't miss this chance, hop from a blog to another!

We all know how truly and deeply american Halloween is, so...what's better than having a great cheesecake? We love cheesecake, and to adapt it to this occasion, we decided to add a little bit of pumpkin to it, along with salted caramel (yummy!) and the uber tasty pecan nuts.


Tarta de queso con calabaza y caramelo salado
Detail of our Pumpkin cheesecake, or "Pumpcheese cake" 


Ingredients: (for a 20 cm wide mould)


For the base:
  • 1 pack of Digestive cookie
  • 2 tbsp of brown sugar
  • 1/2 cup of well minced nuts (or the dried fruit you've chosen)
  • 1/2 cup of melted butter
For the cake:
  • 800 g.approx. of Philadelphia-like cheese
  • 200 g. of sugar ( 150 brown + 50 white)
  • 400 g. of mashed pumpkin*
  • 1/4 cup of heavy cream ( 60 ml aprox.)
  • 4 middle-sized eggs
  • 1 tsp of Pumpkin pie Spice*
  • 2 Tbsp of corn starch
  • 1 1 tsp of vanilla
especias para la tarta de calabaza
Pumpkin pie Spice
For the caramel topping: 
  • 1 cup of sugar
  • 1/2 cup of water
  • 190 ml. of warm heavy cream
  • 20 ml of unsalted butter
  • 1 tbsp of salt
  • 1/2 tsp of vanilla
  • Pecan nuts to taste


Preparation: 

We'll use a springform cake tin some 20 cms wide. We'll start by greasing the pan and putting the baking sheet on the base to prevent the cake to stick to the pan.

Start with the base of the cake. To do so, mince the cookies and toss it all (the cookies and the rest of the ingredients) into our pan and press them with a spoon or a spatula until we get an uniform base. We want a base without edges and smooth. We put this aside.


For the filling, add the creamy cheese to our Kitchen Aid (with the leaf on) or our handheld mixer and mix it until you get a very uniform cream.


Next, add the mashed pumpkin and the sugar. Keep on beating at slow speed to avoid that the air enters into our cream.

Add the heavy cream and the corn starch. Add the eggs, one by one. We do not add another egg until the previous one is still not well incorporated.

Add the spices and the vanilla. Beat it all well (at minimum speed) and pour the mix into our mould, above the cookie base.


Next, we pop it into the oven at 150°C, we will cook it with above and below heat without fan for about an hour approximately.

When you take it off the oven, let it cool completely in a rack. To remove the cake from its mould it's better to avoid until it's cool. The best thing is to cook it the day before you eat it, in order to let the cake develop a great texture in the fridge. It's a very smooth cheesecake that will surely reminds you of a pudding.


corte de cheesecake de calabaza


Preparation of the salted caramel:

While our cake is in the oven, we can cook the salted caramel for our topping. To do so we take a pot, we add the sugar and the water and we heat it at medium-low heat until the sugar melts. Very important is to never stir.

When the sugar will have completely melted we rise the heat until we start seeing a golden brown colour (or about 8 to 10 minutes). Then we low a little bit the heat and we pour paying great attention and little by little the heavy cream (that we've previously warmed it up) and we stir energically with a wooden spoon. Be very careful on this step because the caramel cause painful burns (personal experience)

We turn the heat off and we add the butter, the vanilla and the salt, we stir it and there you have it! Let it cool and...try to resist the temptation to put the finger inside the caramel, because it burn!

We decorate our cake as we want, with the caramel, the pecan nuts and...let's enjoy it!


Image and video hosting by TinyPic

Do not forget to visit the other pumpkins!


Pumpkin time | . | Topper para cupcakes de calabaza | . | Calabaza en tacha | . | DIY: Calabazas pintadas | . | Calabazas, castañas, boniatos y bomboncitos | . | Blog hop Halloween | . | Calabaza tré chic | . | Bizcocho de calabaza especiado | . | Pumpikinized Portraits | . | La noche de Halloween, la leyenda de la calabaza | . | La magia de las calabazas | . | En otoño, calabazas… |. | Happy Halloween la calabaza scrappi | . | Pumpkin Cake with Ginger-Mascarpone Frosting |. | Detalles con calabaza | . | Smoothie de calabaza, piña y manzana |. | Y a ti, ¿te dan calabazas? |. | Globeando | . | Cheesecake de calabaza con caramelo salado y pecanas | . | Un cupcake para Hallowen: Pumpkin spiced cupcakes | . | Jugando con calabazas | . | La calabaza y la luz | . | Calabazas para Halloween : sello handmade & freebie | . | Kreativity | . | Adoptar tradiciones: calabazas de halloween  | . | calabaza + miel | . | Bruna Bruneta: Contes macabres

miércoles, 17 de septiembre de 2014

The Gelato Affogato al Caffè

The Gelato is an all time favourite dessert, and it's now enjoyed all year round. The old days are gone, when you had to wait until summer to have an ice cream! For this reason, we want to tell you about a super simple and easy recipe, ready in three fast steps!


It is the kind of self-indulgent excuse that  italians have developed to keep eating gelato even in the cold winter, even at Christmas! It is called "Affogato", and even if the word in italian may sounds nice and sweet, it actually means "drowned". The recipe explains it all: it is made actually drowning the gelato into a lot of coffee. Coffe and Gelato. Come on, isn't it great? Throungh this match of flavours, your ice cream will gradually melts, becoming partly cold and partly frozen, making your mouth go flippin' crazy! 

This is a very simple, almost basical, obvious invention, we know. But, as all the simplest thing in the world, it's simply genial. The taste is very refined, elegant and aromatic, if possible the coffee enrich the taste of the gelato even more! Do you remember how the contrast bitter-sweet works? Well, the bitterness of the coffee boasts the sweetness of the ice cream! We do not have any information about who may have invented it and when/where, what we know is that this kind of delicious hybrid is gaining momentum every single day. Probably, as the best culinary invention, it will become a classic throughout Western World in a matter of a few years.


The Affogato has even triumphed at the Gelato World Cup!

For instance, it's striking that in the event that took place in Rimini, Nothern Italy, from 5th to 7th of September 2014, the "World Gelato Tour" at the Sigep fair (international fair of gelateria, pastry and baking) and organized with the Università del Gelato Carpigiani, the world's best gelato prize was given to...an affogato! The full name is "Mandorla Affogato", or almond affogato, created by the Aussie bros John and Sam Crowl. More details on the ingredients? Sirs and madames, hold on to your hats! Vanilla from Madagascar, Variegato with caramelized and toasted almonds, Kenya coffee, with salted caramel sauce.
We'll breing you here a stripped down and more simple and accessible version of this delicious dessert, but we're sure you'll enjoy it almost as we do, and we do enjoy it a lot!
In three simple steps:


Ingredients:

- Ice cream (smooth tastes, like vanilla, stracciatella or so)
- coffee (good coffee, not too watery. The ideal would be an espresso or moka coffee)
- Bayleis cream whiskey or similar
- In alternative, you can use hot chocolate or masala chai tea instead of coffee.

Preparation:


- Prepare a good coffee, a discrete amount of it. You can use your Moka coffee pot, the taste of the coffee is quintessential, it must be not just good, but "buono buono!", otherwise the Affogato will result too watery. Here for instance we tell you about doing a great coffee at home with the Moka! Most important is never put sugar in your coffee, you want it to be bitter as hell!

- Take a gelato, possibly a vanilla, almond, fiordilatte or stracciatella one. Remember to avoid strong ice cream tastes: it is an italian recipe, and we know how italian dishes permit just one "primadonna", that is only one main taste. And in the Affogato, the main taste is the coffee. If you don't dig the coffee, you can surely use hot chocolate instead, or even tea, we like it with chai tea.


- Take a cup of a glass, and put the ice cream in it (remeber that the gelato goes first, otherwise the ice cream will sadly float above the coffee), then add some whiskey cream like Bayleis and then add the coffee still hot and...the magic! Yuo'll see how the ice cream and the coffee will melts in a match made in food heaven! A warm cream, a cold gelato and a hot coffee...what more can you ask for?


We hope you liked the recipe, have a nice week!

ToM

martes, 15 de julio de 2014

South fashoned Strudel


Today we bring you a typical dessert from Central Europe, very popular in Germany, Austria, Switzerland and Italy: the Strudel. The word Strudel in german language means "vortex", because of its peculiar shape.
There are many versions of this delicious traditional sweet dish, but maybe the most famous is the one made with apples, the "apfelstrudel", done with the excellent fruit that grows in the eastern part of the alps: the apple Golden Delicious (have you ever heard of Marlene apples from Italian Südtirol?). The Turks exported this dish to Hungary, that at the time was under their domination. In Hugary still nowadays we find another "cousin" of the Strudel, called Rétes. It become a "central European" dessert after the success of the Austro-Hungarian Empire, and it wasn't until the XIX century that it started being called "strudel". In Italy we find it in the zones that once were under the domination of the Austro-Hungarian Empire, and of course in the German speaking area like Südtirol-Alto Adige. In the nearby area of Trentino it has been somewhat "italianized" using the pasta frolla dough  (the one used to make the crostata) instead of the phyllo dough. 
From region to region, with the pass of the time, the recipe has evolved and adapted to the local taste, but we guarantee you that each one of these recipes is literally to die for!

We wanted to give our twist to the original recipe, bringing it to the warmth of the South, using the Marsala wine (typical of Sicily) and changing the usual currants and the cinnamon for something that fit beter the summertime, like the papaya and pineapple. We apologize with the lover of the original strudel recipe! ;)

Ingredients:

For the dough:
  • 200 g. of flour (half normal and half wheat flour)
  • 3 spoonful of olive oil
  • 1/2 spoonful of salt
  • 1 spoonful of sugar
  • 1 glass of water
For the filling:
  • 3 apples type Golden Delicious
  • 3 spoonful of dried fruits to taste (in my case papaya and pineapple)
  • 1 cup of Marsala wine
  • 100 g. of sugar
  • 75 g. of peeled walnut
  • 50 g. of breadcrumbs
  • 1 egg to paint the surface

Preparation:

1- First of all, put the dried fruit into our cup of Marsala wine. If you can't find it, you can use another kind of similar sweet wine like a Brandy.


For the dough, mix the flour with the olive oil, the salt, a spoonful of sugar and warm water (we'll use enough water to obtain a non sticking dough, that is more or less a glass). We'll work well the dough of our strudel and we'll extend it with the help of a rolling pin, we want it to be very thin. We put the thin dough into a kitchen towel (covered with flour, otherwise the dough will stick onto it) and we keep on extending it. The towel will help us folding the dough once filled.


2- In a pan with half a spoon of olive oil, we will fry the breadcrumbs mixed with some sugar, obtaining in this way a sort of sand. We will sprinkle half of this "sand" above our dough.


3- peel and cut into thin slices our apples, we take out of the Marsala wine the dried fruit and we sqeeze them a little bit, then we cut them along with the walnuts. We put it all abouve our dough and we put at the top of the filling the rest of the breadcrumbs and sugar. We wrap the dough with the help of the kitchen towel and we close the extremities, in order not to let the filling go out. We paint the surface with beated egg and we cook it in a preheated oven at 175º C during some 45 minutes...and there you are your strudel!


It is perfect to eat it when warm and along with some vanilla ice cream...nom nom!

With the quantities decribed above we'd cooked two small strudel.


Greetings!

AnGie

viernes, 4 de julio de 2014

Onion rings in 3 steps to celebrate 4th of July


To celebrate the 4th of July, we'll bring you a super tasty and traditional american recipe: onion rings. It's a very simple, easy and fast recipe, and it will be most appreciated by your guests for the 4th of July. We've drawn inspiration for this recipe from Jamie Oliver magazine, we loved how they changed the original recipe, and so we've moved just a little bit forward, modifying this recipe just a little bit more. In this recipe onion rings will result crispy and tastier than the usual ones. The first time this recipe was mentioned was in a 1910 Daily Times issue published in Middletown, NY. The restaurand chain Pig Stand affirms anyway to have invented the original recipe in the 1920s. We do not know which one version is the truthful one, what is sure is that is a very american recipe. The following recipe is perfect for about 5 to 6 people, so if you have more or less people, then modify the quantities according your guests' appetite! 


Ingredients:

- 3 golden or white onions 
- 100 g all purpose flour 
- 300 ml or so of buttermilk (you can easily do it at home)
- 300 g of cornstarch
- 1 Tbsp of sweet pimenton (a spanish product, you can replace it with paprika)
- sunflower or olive oil
- salt & pepper to taste

Preparation: 

1) Cut the onion into rings into 3 or 4 mms slices the night before you cook them in order to let them dry well. 

2) Prepare three bowls, in the first one put the all purpose flour, in the second one put the buttermilk*, and in the third one put the cornstarch along with salt and pepper and the sweet pimenton (or paprika if you can't find this spanish delight). Meanwhile, put a pan on high heat with enough oil to fry.

3) Pass the onion ring through the first bowl containing all purpose flour, then for the butermilk one and at last dip them into the cornstarch. Fry the onion rings until they becomes golden brown, for about one minute or so. Remember to turn them upside down to fry them homogeneously. Take them out of the frying pan and let them dry a bit over a kitchen paper and eat them with your favourite sauce. 


Happy 4th of july to all americans and friends of America worldwide!


Greetings,

Angie 

____________
* You can find buttermilk in big retail stores, but you can easily do it at home squeezing a lemon into some milk and let it rest for about 10 minutes or so. In this way you'll have your own buttermilk almost immediately!

miércoles, 25 de junio de 2014

Pumpkin sweet in 3 simple steps


The pumpkin cake or sweet we're talking about today is one of those recipes perfect for any time of the year, since it has to be eaten cold and without a spoon. It's perfect for celebrations, snacks or even party where guests help theirselves, everyone with a piece of this cake and happy with that!

Furthermore, it's so easy that you've no excuses! You can prepare it in a few moments and for the rest you've got your dear friend: mr. Oven! ;)

Ingredients:

  • 1 Kg. of pumpkin
  • 4 eggs
  • 300 g. of flour
  • 200 g. of sugar
  • 250 ml. of milk
  • 125 ml. of olive oil
  • 1 drizzle of liquor (optional)
  • 1 Tsp of Royal
  • 1 Tsp of Vanilla extract
  • 1 tin can of condensed milk ( 370 g. aproximately) 
  • lemon zest


Preparation:

1- We cut, peel and cook well the pumpkin, then we let it dry well, and we shred it with a food processor.


2- We add all the remaining ingredients to the shredded pumpkin, and stir it well until we obtain an homogeneous mix. Remember to sift the flour befor adding it to the mix, in order to avoid bulks.

3-Grease with butter or with olive oil your mould (in my case, a rectangular mould of 30x18 cms), pour the mix in it and we cook it in a preheated oven at 120°C for some 75 minutes or so.

Our cake in the oven

And there you have it! Ready! Let it cool down, take it off from the mould and cut it into pieces. Once it's completely cold you can put it into the fridge to preserve it longer.


It's a very smooth and creamy sweet. If you're like me and you don't dig pumpkins, you'll surely like it anyway, as I do! Try it and it will surprise you!


Greetings!

AnGie