

Ovis Mollis! Even if this may sound like a magical formula drawn directly from Harry Potter's high classes at Hogwarts, it's not an hocus pocus at all...even if only magic would explain the sudden disappearance of these cookies in a matter of second! Today we bring you the recipe of a delicious italian cookies that are made with pasta frolla, an ancient italian super crumbly version of what had later been know in English speaking World as pate brisee. Let's try this version, let's try pasta frolla! It's outrageously simple and I still haven't met anyone who hasn't deeply enjoyed these cookies!
The Ovis Mollis are a typical kind of cookies traditional of the North Western part of Italy. In the dough of this particular version of the Pasta Frolla the key ingredients are the boiled egg yolks instead of fresh yolks, which makes the texture of these cookies simply irresistible, they seems high patisserie, and they even taste better than high patisserie if we may be completely sincere with you. But they are super simple to do!

Their name, Ovis Mollis, mention the latin word "ovis" that in this case may be translated into "egg", indicating us the key ingredient of the recipe, but ovis may also mean "sheep", and in this case the phrase would be translated into somewhat similar to "fluffy as sheep wool", maybe because of their very typical "cloud-like" texture.
The Pasta Frolla is the base ingredient for many italian sweet dishes, that is much more crumbly, inestable and sandy than the pate brisee. That may be considered somewhat an handicap when preparing pies, but it's actually in the taste that the Pasta Frolla just brings us into another level. In italian, frolla means somewhat inestable, and the name tells us all about it! It is used into a lot of pies like the crostata, like the torte (tarts), like the frolle (sandy cookies) and the pasticcini (petit patisserie).
It's difficult to discover the history of Pasta Frolla, because it's an ingredient so universal that everyone claims the paternity of the recipe. So, let's stick to the facts: the first mention of this dough is to be found around year 1000 in the Republic of Venice, the Gate of the East.
Of course, we know that through the Serenissima (as it is called Venice), many products were introduced to Western Europe, like the sugar cane, imported from Egypt and Siria, quintessential ingredients for the pasta frolla. Lately, around year 1600, the pasta frolla reached the modern texture and taste, almost in the same time when the pate brisee was first described in the recipe books in France.
The Ovis Mollis, as we previously mentioned, are made with a kind of Pasta Frolla where the egg yolks are boiled and not fresh and it is used potato starch too. Maybe their origin is to be find into a cookies from Piedmont, called the Margheritine di Stresa. We are in the year 1857, in the very beautiful town of Stresa, in the Lago Maggiore, one of the most beautiful northern Italian lakes facing the Alps. When still a little girl, the future queen Margherita di Savoia (the queen after whom the Pizza is named, that queen may have been the World's first foodie!) used to enjoy its vacation in the Villa Ducale of Stresa, where a pastry chef, Pietro Antonio Bolongaro, was seeking an unique recipe for a cookie that were as fluffy as a cloud.
These cookies were offered to the future queen at her Forst Comunion, and Margherita suddenly fell in love with them. These cookies, named then "margheritine di Stresa" after her, were used also in the official meetings with the Queen after she moved to Rome at the Qurinal Palace. When the the son of the pastry chef Bolongaro inherited the atelier of his dad, he decided to sell these cookies to all, because they were just too good to be only a King's delicatessen. Still now, after 150 years, the "margheritine di Stresa" are a most typical product of the Lake Maggiore area.
 |
| The lake Maggiore and the Alps as seen from Isolabella |
Ovis Mollis seems to be strongly related to the Margheritine di Stresa, since the two recipes have almost the same ingredients, even if the Margherite have less boiled eggs in their recipe.
Unluckily, we have no detailed histoty for the birth of the Ovis Mollis, but we can tell you that they appears for the first time in the 1907 book by Giuseppe Coccia "Il pasticcere ed il confettiere moderno" (the modern pastry chef and confectioner). Ciocca was a very creative artist/chef that was born in 1867 in Treviglio, an enchanting town between Milan and Bergamo. Truth be said, the recipe that we can find in Coccia's book is different from what we can we can see in modern days pastry shop: they are somewhat similar to little, flat doughnut.
The version of the Ovis Mollis that we show you today is maybe the most frequently used for this kind of Pasta Frolla, and it is called in the pastry ateliers as "Occhio di Bue", or in english "eye of the ox": balls of dough lighty pressed at the center, creating a sort of hollow filled with cream, chocolate or jam.

Recipe:
Ingredients:
200 g. of unsalty butter
200 g. of flour
100 g. of icing sugar
100 g. of potato starch
5 boiled egg yolks
1 spoon of Vanilla extract (or some vainillina)
a pinch of salt
Some jam for the filling
Preparation:
1- Start with boiling the eggs and separating the egg yolks and the eggs white. Shred the egg yolks and then put them aside.

2- We put all the ingredients in a bowl: the flour, the shredded egg yolks, the potato starch, the cold butter sliced into dices, sugar and a pinch of salt. Knead it until we obtain an homogeneus dough. Cover the bowl with plastic wrap and pop it into the fridge for about two hours.


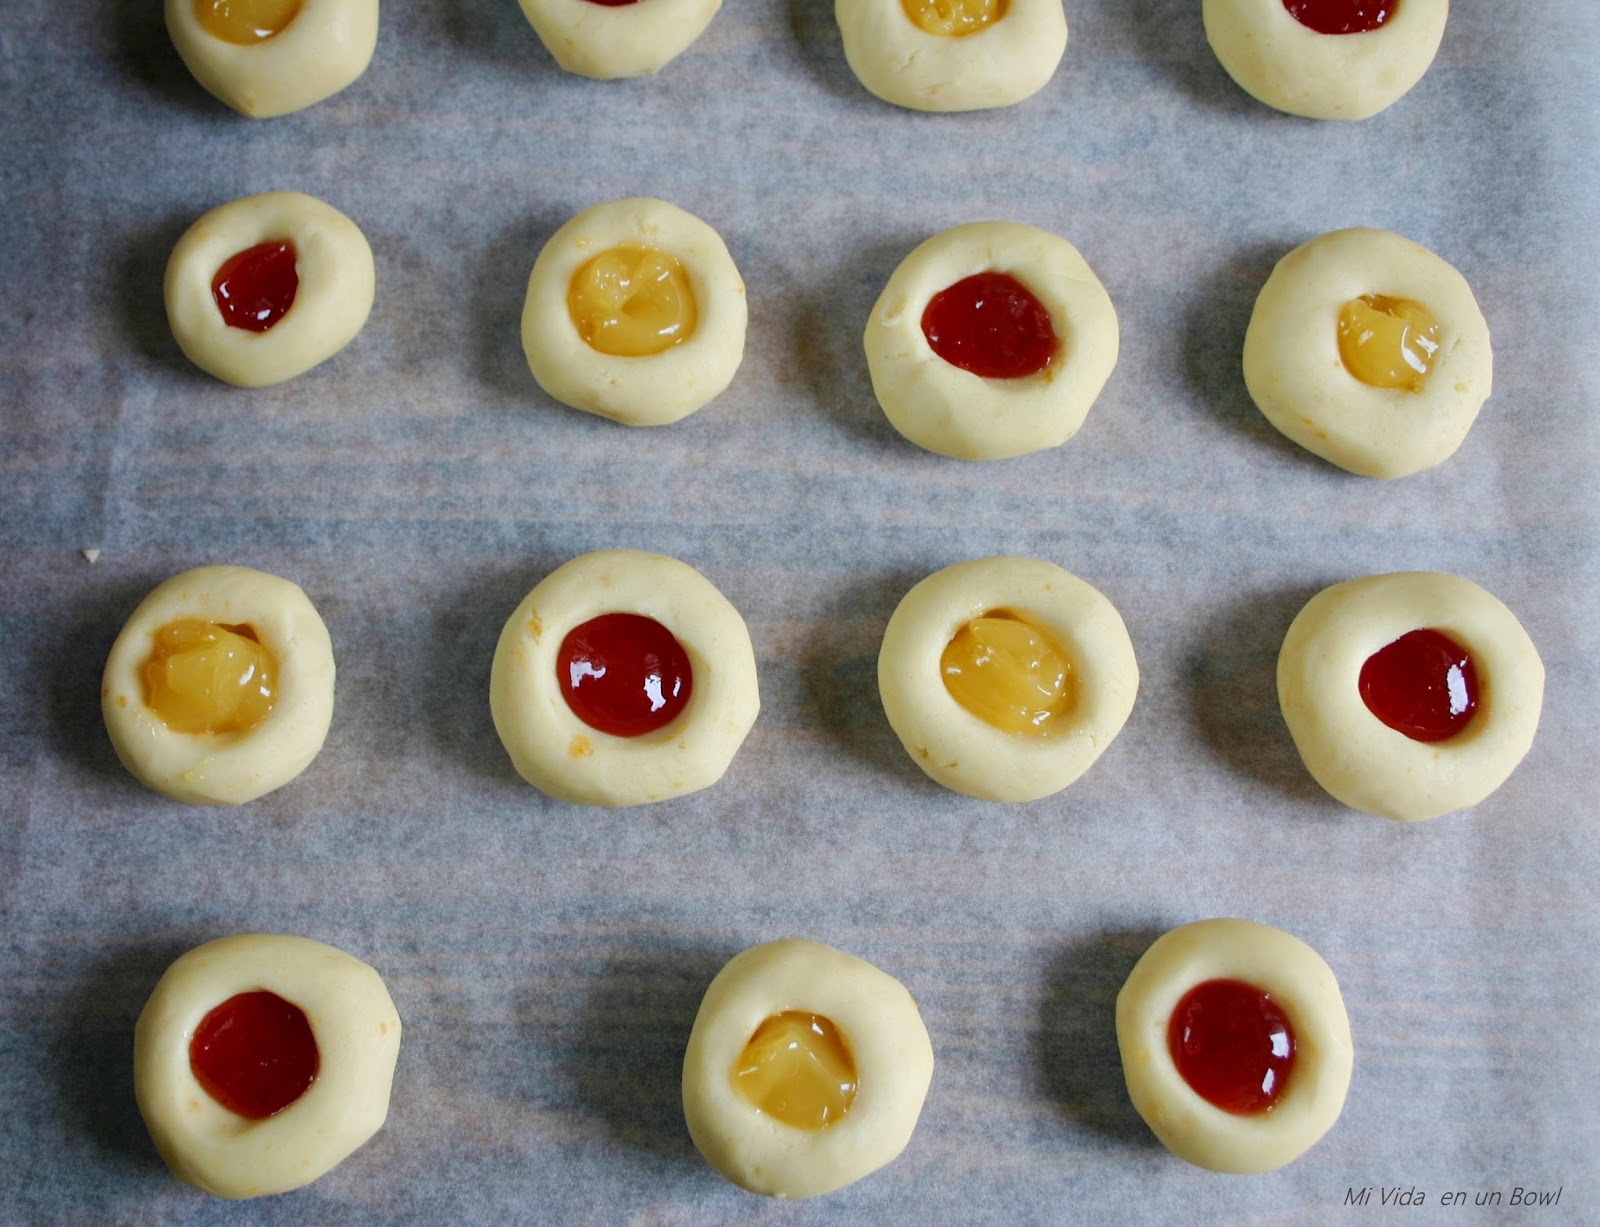
3- After two hours into the fridge, we cut the dough and we make little balls some 3 centimeters wide. We put it into a tray covered with baking paper, then we lightly press the center of the little balls creating the hollow for the filling.


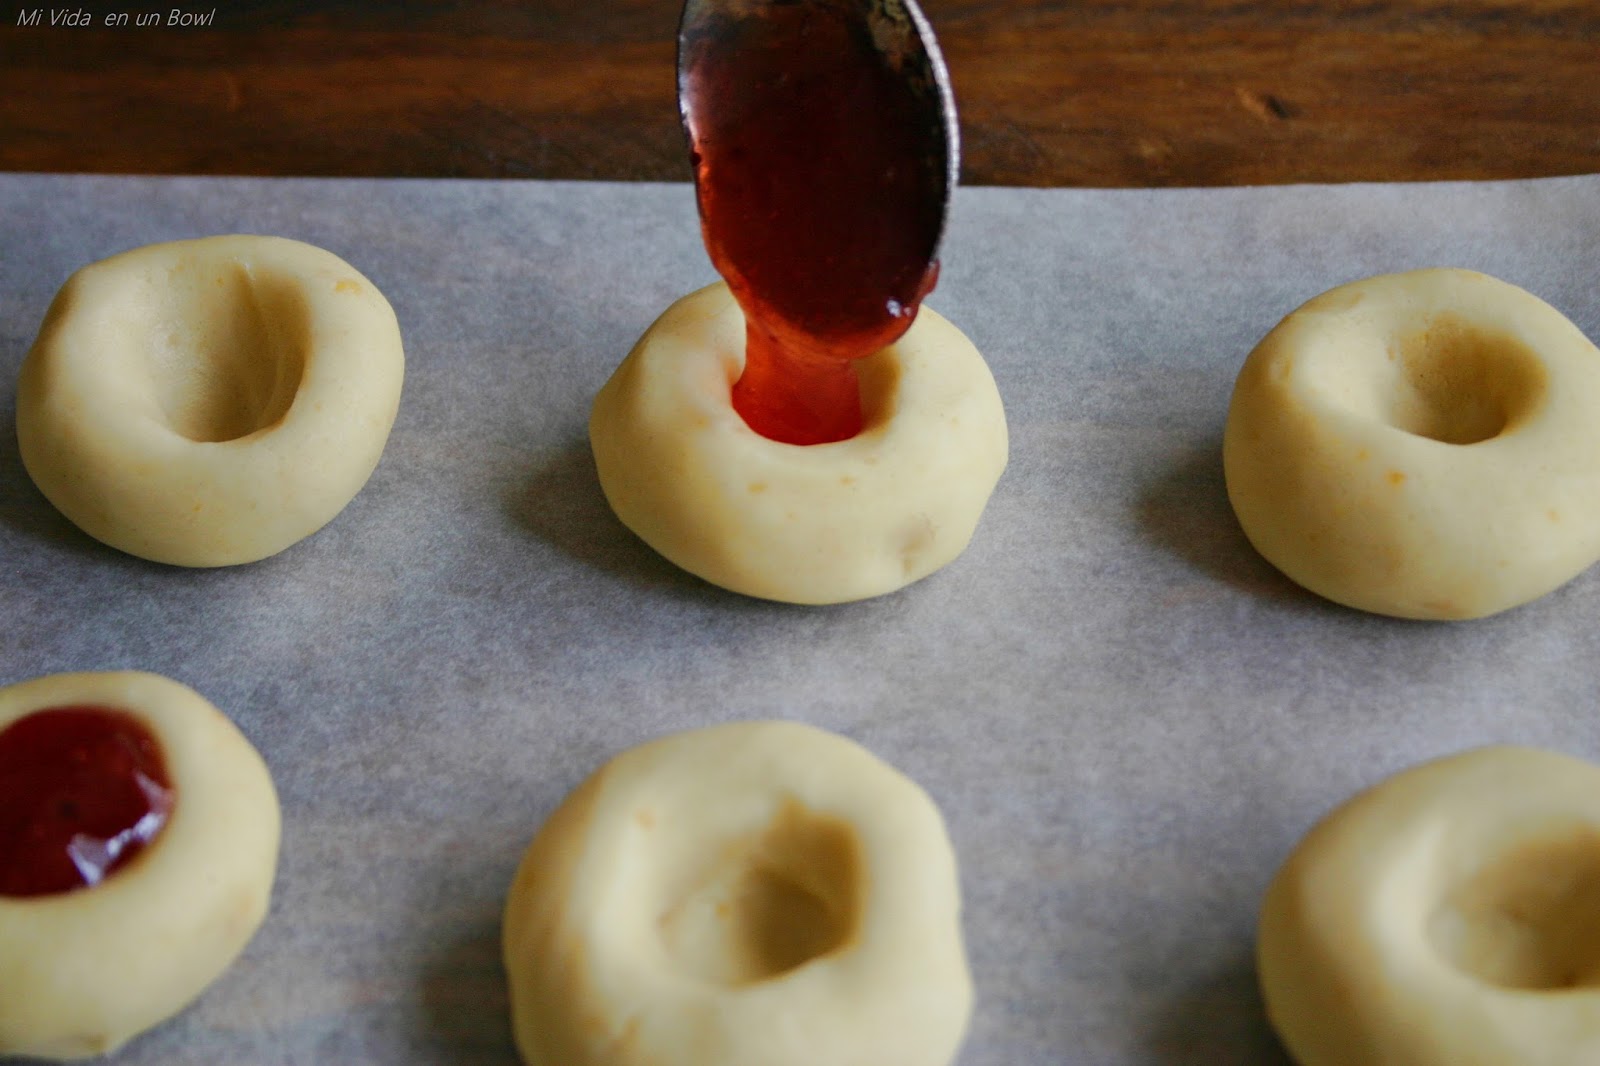
4- Preheat the oven at 180ºC. These cookies can be baked with or without the filling, if you prefer. We usually choose different kind of jams and fill the cookies before we bake them, in this case we've chosen red fruit jam and lemon curd...yummy!
5- Bake the cookies for 12 to 15 minutes. Do not let the cookies to overbake, we don't want them to become golden brown, they must remain somewhat pale, otherwise they would be too much friable.

Enjoy them! Remember the magic formula for these italian cookies: Ovis Mollis! They'll put a spell on you!


